System requirements
Supported Operating Systems:
•Windows Server
•Windows Server 2019
•Windows Server 2019 Core
•Windows Server 2016
•Windows Server 2016 Core
•Windows Server 2012 R2
•Windows Server 2012 R2 Core
•Microsoft Hyper-V Server
•Microsoft Hyper-V Server 2019
•Microsoft Hyper-V Server 2016
•Microsoft Hyper-V Server 2012 R2
•Windows
•Windows 10 with Hyper-V role enabled
•Windows 8.1 with Hyper-V role enabled
Software Prerequisites:
•.NET Framework 4.6.2 or higher.
•Hyper-V PowerShell module installed.
Service accounts – permissions:
•Backup Agent Service (CDHypervBackupAgent) user should have local administrator’s privileges. This requirement is usually met when the user is a member of local administrators group on the Hyper-V host or Administrators group in Active directory in the case of domain environment.
To install a Hyper-V agent you need to follow these steps:
1.Download Hyper-V agent installer from here https://clouddaddy-uploads.s3.amazonaws.com/agent/BackupAgentHypervSetup.msi.
2.Run BackupAgentHypervSetup.msi and press Next button on the Welcome step of Cloud Daddy Secure Backup Hyper-V Agent Setup Wizard.
3.Select a folder for Cloud Daddy Secure Backup Hyper-V Agent.
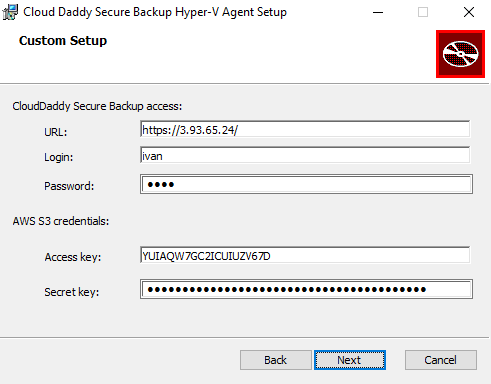
4.Specify the details for accessing the Cloud Daddy Secure Backup application and credentials to AWS account in which the Cloud Daddy Secure Backup application is deployed. Press Next button.
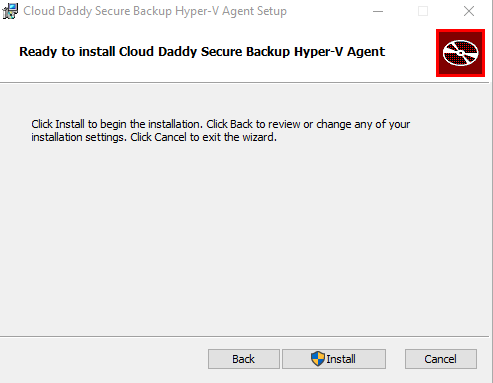
5.Ready to install step of Cloud Daddy Secure Backup Hyper-V Agent Setup Wizard will appear. Click Install.
6.When installation is complete, click Finish:
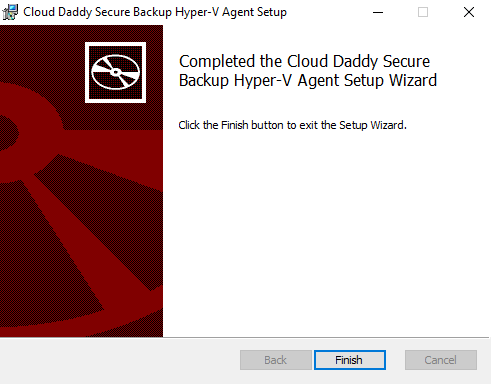
The installation is complete.