The AWS Marketplace will always have the latest version of Cloud Daddy Secure Backup. You can simply search for cloud daddy on the AWS Marketplace to see the latest product listings. https://aws.amazon.com/marketplace/search/results?x=0&y=0&searchTerms=cloud+daddy&page=1&ref_=nav_search_box . The latest software version available is prominently displayed within each product edition listing on the AWS Marketplace. If you notice a new version, you can always upgrade to the latest version of the product, free of charge.
Upgrade requires the following conditions:
•You are running a CDSB instance with an old application version.
•There is a new CDSB AMI available containing a new application version.
To upgrade CDSB, you need to complete the following steps:
Please note: The upgrade process has been designed with the best of intentions to automate and simplify the upgrade process while following and adhering to AWS best practices. It is recommended to watch the short video that explains each step of the upgrade process and is a very helpful resource for questions related to upgrading the software: https://www.youtube.com/watch?v=yXJD8dC4VZ4
1.Ensure that none of the backup or restore jobs are currently running by logging in to your existing installation of Cloud Daddy Secure Backup and checking that none of the backup or restore jobs are currently running. You can check for example by selecting “Backup” from the Menu and then clicking on the “Backup” tab. Once you confirm that nothing is running, you can exit the application by logging out by clicking on the “Exit” button located in the upper right hand corner of the application screen.
2.Stop your CDSB instance with the old application version. You will need to login to the AWS Management Console to perform this task in order to preserve your existing software configuration and setup. Navigate to the “EC2” dashboard using the left side menu and select “Instances” whether from the left hand menu or within the Resources section of the management console. Click on the Cloud Daddy Secure Backup instance, which will highlight the entry in blue. Then click on the “Actions” button, navigate down and select the Instance State option from the dropdown menu and finally select “Stop”. After you click on “Stop” from the menu, your existing instance of Cloud Daddy Secure Backup will stop from running after a minute or two.
3.Detach the volume (Block Device “xvdf”) from the CDSB instance containing the old application version. To do this, expand the lower section of the management console to display the “Description” tab for the Cloud Daddy instance. You can resize the “Description” section manually to increase its size. You will need to record a few pieces of information that will be used later. Locate the “Subnet ID” as shown on the right side and make note of it. The “Subnet ID” will be used later when we perform the software upgrade. Next, locate the “Block Devices” section on the right hand side of the information shown within the dialog. Click on the Block Device labeled “xvdf”. The “Block Device xvdf” dialog box will display. Click on the “EBS ID” which is underlined and will highlight in an orange font when you hover your mouse over it. Make note of the “Volume ID” along with the “Subnet ID” you recorded earlier because you will need both later when you upgrade the software and reattach the volume. Click on the “Actions” button and then click on “Detach Volume” from the dropdown menu. The “Detach Volume” dialog will display asking if you are sure that you want to detach this volume. Click on the “Yes, Detach” button.
4.Check the Availability Zone for the detached volume and make note of it.
5.At this stage, you are now ready to perform the software upgrade. From the AWS Marketplace, select the same product edition you have installed of either Starter, Growth, Enterprise or bring your own license (BYOL). Click the “Continue to Subscribe” button at the top of the product listing. You can review the end user license agreement as well as pricing and when ready, click the “Accept Terms” button. The subscription to the product will take a few minutes for AWS to process and when prompted, click on the “Continue to Configuration” button. The fulfillment option, software version and region will be displayed. Accept the defaults and click the “Continue to Launch” button. You will be prompted to “Choose Action”. Select the “Launch CloudFormation” option from the dropdown menu. The “Launch” button will then appear for you to click on. Click on the “Launch” button to proceed to the next step. You will be prompted to create a CloudFormation stack. Accept all of the defaults and click on the “Next” button. You will need to give the stack a name. Type in “CloudDaddy” with no spaces or special characters since they are not allowed here. You will next need to specify and IP address or IP address range in CIDR format which defines who exactly can RDP into the Cloud Daddy instance. 192.168.1.100/32. You will next have to select a “Keypair”, and then enter the “RefVPCid” that you had made note of earlier and finally select the “Subnetid” that you had also made note of earlier. Click on the “Next” button on the bottom right of the screen. You will then be presented with the “Options” screen and you can simply accept the defaults here and click on the “Next” button on the bottom right of the screen. You’ll be presented with a “Review” screen where you can review the information and when ready check off the box for “I acknowledge that AWS CloudFormation might create IAM resources” and finally click on the “Create” button on the bottom right of the screen. Please note: If you do not check off the box or forget to check off the box, you will get an error at the top center of the screen about a stack creation error requires capability_IAM. Simply check the box for “I acknowledge that AWS CloudFormation might create IAM resources” and finally click on the “Create” button on the bottom right of the screen to clear the error. You will then be taken to the “CloudFormation stacks” page where you can see the new stack creation in progress. The new stack should appear, but if it does not, hit the refresh button on the screen. This process not only creates the template but also goes off and creates the Amazon EC2 Instance which will ultimately become your AWS Cloud Daddy Secure Backup instance. After the Status has changed to CREATE_COMPLETE, we can proceed to the next step. Click on “Services” in the upper left hand of the screen and then click on “EC2”. Within the “Resources” tab, then click on “Running Instances” and you will be able to see your newly created and running instance of Cloud Daddy Secure Backup. You may have to wait for your instance to complete the initialization and display a status of “running”. You can expand the “Description” dialog box to display more information on the screen. When the status displays the instance is running we will need two pieces of information. First, we will need the “Public IP Address”, which is contained on the right hand side of the “Description” dialog of “IPv4 Public IP”. Please copy it to the clipboard and also make a note of this IP address since you will be using it in the future to access the Cloud Daddy Secure Backup instance. We will also need the “Instance ID” which is contained on the left side of the “Description” dialog box. Please make a note of the “Instance ID”.
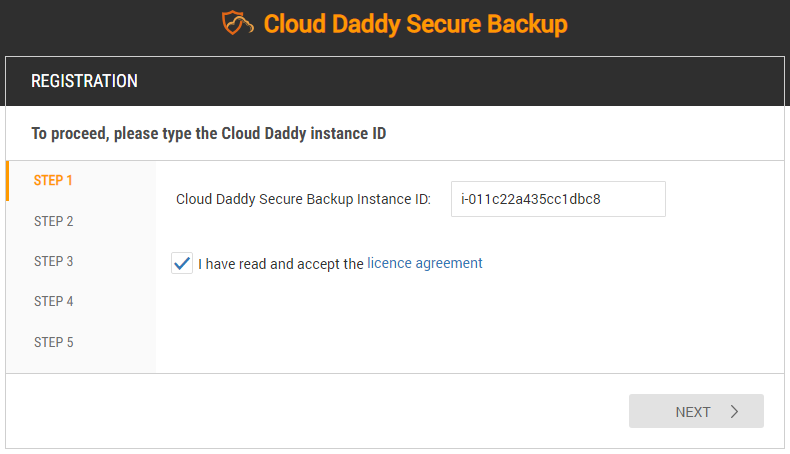
6.Open an additional tab on your Browser and connect to CDSB using the instance’s public IP address (https://A.B.C.D) which you made a note of from the AWS Management Console earlier. Enter https:// at the start of the IP address. Initially, you will get a message that your connection is not private, but you can ignore it and proceed to connecting to the IP address. Please be patient and wait about 30 seconds or so for the initial registration screen to display. Once it displays, you will need the instance ID to be entered that you had previously recorded from the AWS Management Console.
7.Enter the CDSB instance ID, which you made note of earlier from the AWS Management Console, when prompted on step 1 of the registration wizard. You can switch Browser tabs to the Management Console, copy it and then switch tabs back and paste it in. Check the box that you have read the license agreement and click on the “Next” button.
8.Enter the global administrator user name, e-mail and password on step 2 of the registration wizard. The global administrator user name must be the existing user name with the role of “Global Administrator”. In other words, the username and password entered here must match what was configured in your prior, older Cloud Daddy installation. Click the Next button when done.
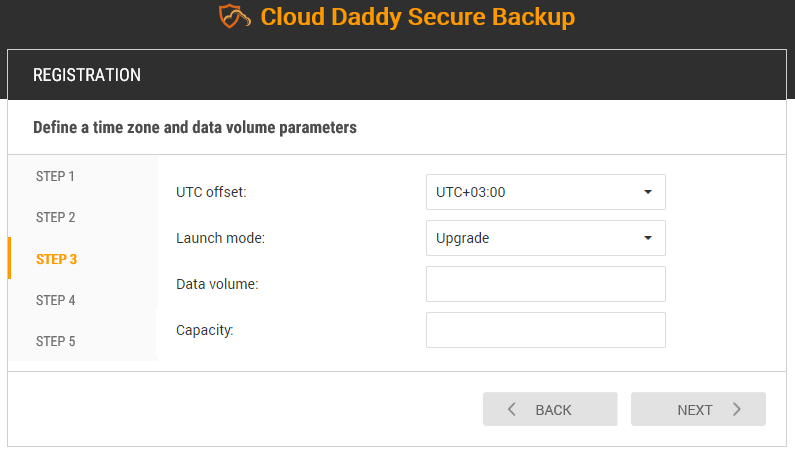
9.Select the time zone and set Launch mode to Upgrade. Fill in the Data volume field with the Volume ID of the existing Volume containing the CDSB (Block Device “xvdf”) on step 3 of registration wizard. This is the Volume ID for the CloudDaddyDataVolume you had originally detached and wrote down from your existing Cloud Daddy Installation. If you forgot to make a note of it, you can go back to the AWS Management Console, click on Volumes from the left side menu and look up the Volume ID for the CloudDaddyDataVolume. Specify the disc size for the CDSB DB in the Capacity field if needed. Click the “Next” button.
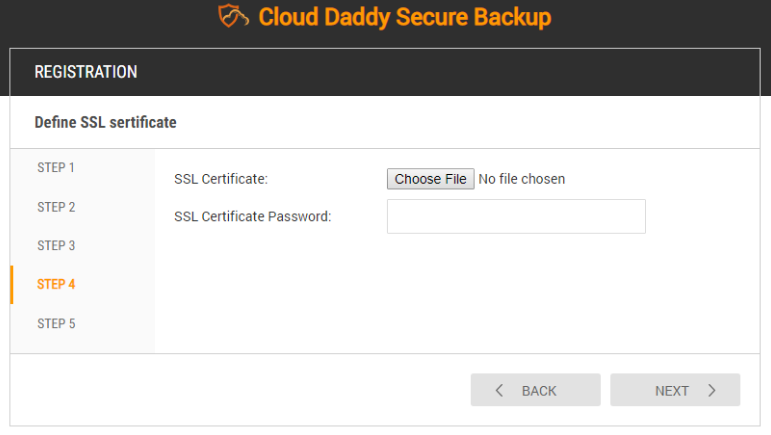
10. If desired supply an SSL certificate and password which will stop the security message from happening when you access the Cloud Daddy instance in the future. If you do not have one, you can simply click the “Next” button.
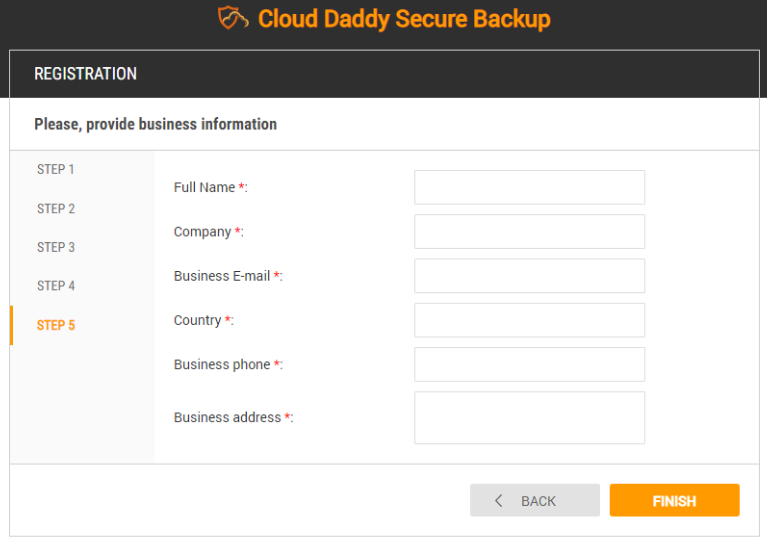
11.Finally, enter your contact information and click on the “Finish” button. Please be patient and wait a few minutes as the registration process completes. When done, you will be presented with the login dialog. Login normally with the username and password you had configured.
Congratulations! You have completed upgrading your Cloud Daddy Secure Backup instance to the latest version!